REVIEW · FUERTEVENTURA
Fuerteventura: Wild North and Corralejo Tour From the South
Book on GetYourGuide →Operated by VIP Cofete by Dogo Canario GER · Bookable on GetYourGuide
Fuerteventura can feel endless, and this route proves it fast. You start in the south, then work your way north for wild coasts, volcanic stops, and free time in Corralejo.
Two things I especially like: the small group size (max 8) keeps the day from feeling like cattle-car tourism, and the crater walk at Calderon Hondo adds real “only-in-Fuerteventura” drama. The biggest consideration is walking on uneven volcanic ground—if you’re unsteady, plan carefully.
In This Review
- Quick Hits Before You Go
- From the South to the Wild North: how this day tour really plays
- Pickup and drop-off: Costa Calma, Morro Jable, Esquinzo
- Dunes de Corralejo: quick views that set the tone
- Calderon Hondo crater walk: the part to plan for
- Corralejo free time: what you can do with 1 hour
- Playa El Mejillón: the scenic photo stop
- El Cotillo at the finish: fishing village character
- Driving time, off-road bits, and the real pacing math
- Price and value: why $88 can make sense here
- Who this tour fits best (and who should rethink it)
- Should you book this Wild North and Corralejo tour?
- FAQ
- What’s the duration of the tour?
- How many people are in the group?
- What languages are offered?
- Where does pickup happen?
- Where do you drop off?
- What stops are included?
- Is food included?
- Is the tour good for people with limited mobility?
- What should I bring?
- Is it refundable if plans change?
Quick Hits Before You Go
- Small group (8 people) means more personal guide attention and easier van logistics
- Calderon Hondo crater walk turns the day from scenic driving into real walking time
- Dunes + views of Lanzarote and Lobos give you that north-coast wow factor early
- Popcorn Beach is genuinely different, thanks to sand that looks and feels unusual
- Free hour in Corralejo is perfect for lunch or a beach reset, but it can feel short
- El Cotillo finishes the trip with old-fishing-village charm and ocean views
From the South to the Wild North: how this day tour really plays
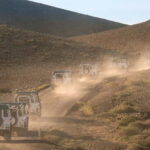
This is the kind of tour I think makes sense if you’re staying in Costa Calma or Morro Jable and want a strong hit of northern Fuerteventura without renting a car. In about 7 hours, you cover dunes, a volcanic crater, a resort town, a weirdly famous beach, and a fishing village—so the day feels like a greatest-hits sampler. And because it’s a van with a guide, the stops actually connect, instead of you spending half the day “figuring out” roads.
The tour also has a smart pacing mix: short photo stops, one focused walk, and one real breathing moment in Corralejo. That balance matters. Too many combo tours either rush everything or leave you parked too long somewhere you don’t care about. Here, the rhythm is closer to road-trip energy—just guided.
One more practical note: multiple guides (including Isabel, Tim, Dirk, Marcel, Raik, Pierre, and Christopher) are repeatedly described as friendly and information-rich, and the day usually stays organized even when you’re moving across different terrains.
You can also read our reviews of more tours and experiences in Fuerteventura.

Pickup and drop-off: Costa Calma, Morro Jable, Esquinzo
You have three pickup options: Costa Calma, Morro Jable, and Esquinzo. The van meets you outside your hotel, and you’ll receive a precise pickup time the afternoon before—look for a grey Renault and give yourself about 5 minutes outside.
This matters because the schedule is tight enough that being late can ripple through the whole day. If you’re the first pickup, you might end up with a longer overall day than the headline “7 hours,” based on how the day runs for different route timing.
Your drop-off mirrors the three options again: Esquinzo, Costa Calma, or Morro Jable. So you’re not stuck making your own way back after the last stop.
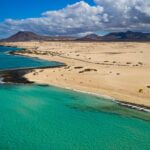
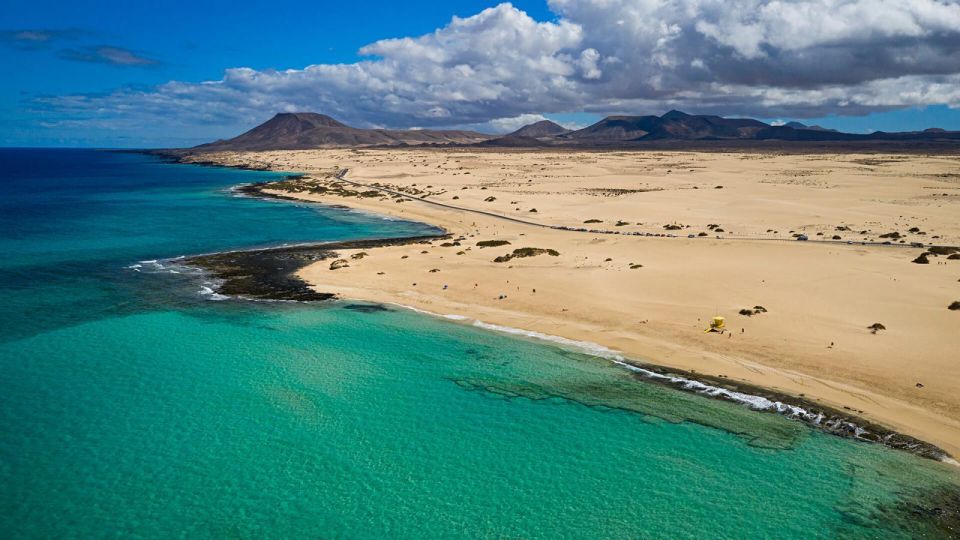
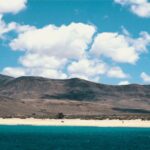
Dunes de Corralejo: quick views that set the tone

Right after the van ride (you’ll spend about 1.5 hours driving to the first north stop), you get a 20-minute photo stop at the Dunas de Corralejo. The payoff here is the view direction: you can look toward Lanzarote and Lobos, and you’ll understand why the north feels wilder and more exposed than the south.
Even though this is a short stop, it functions like a warm-up. You’ll feel the terrain shift—more volcanic texture, more open horizon—and it makes the later crater walk feel even more dramatic.
Tip: bring a camera that handles bright sun well. These north viewpoints are high-contrast photography spots, especially when the light hits the sand and rock.
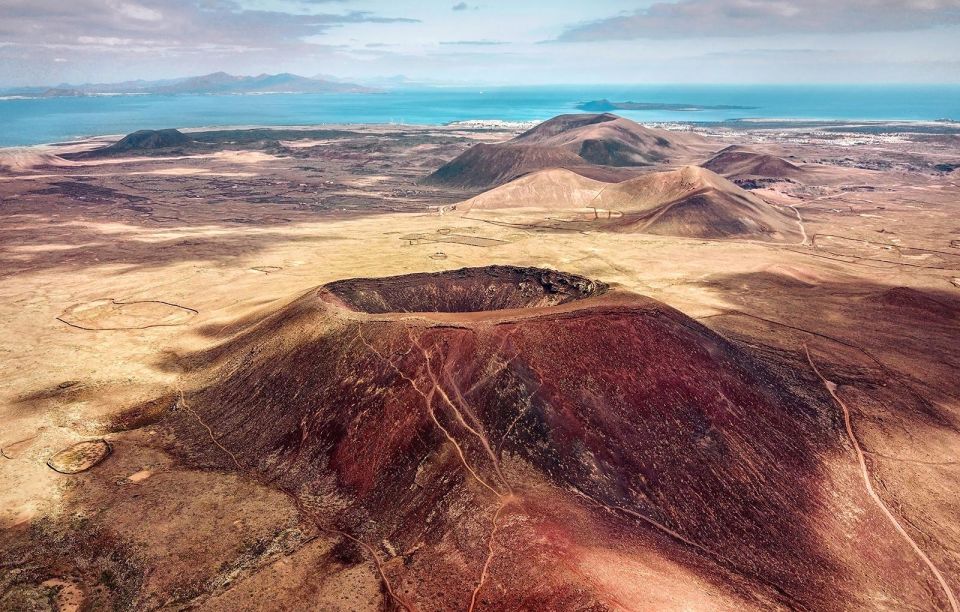
Calderon Hondo crater walk: the part to plan for
The crater is the tour’s signature hike. At Calderon Hondo, you’ll get a photo stop, a visit, and a walking segment of about 30 minutes to reach and peer into the volcanic crater.
Here’s the honest consideration: the climb can be more difficult than people expect. The path is uneven and volcanic, and at least one guest specifically warned that if you’re unsteady on your feet, this may not be for you. Another noted that their shoes ended up dusted with red grit from the surroundings. That’s not a reason to skip it—it just means you should dress for it.
What to bring for this segment:
- Comfortable shoes with grip
- Sunscreen (the crater area is not a shade factory)
- Comfortable clothes you don’t mind getting dusty
Also, weather can change the exact experience. One booking mentioned rain disrupting the plan, with a guide offering a plan B that involved walking inside a crater instead. So even if conditions shift, you’re not guaranteed a total skip—you’re more likely to get a modified version of the volcanic theme.
This is where guides like Isabel and Tim really shine in the reviews: they’re described as energetic and great at explaining what you’re seeing while keeping the group moving safely.
Corralejo free time: what you can do with 1 hour
After the crater, you get your main “slow down” moment: Corralejo with about 1 hour of free time. You can shop, grab lunch (food isn’t included), or do a quick beach wander.
This stop is intentionally timed to keep the whole day moving. For many people, that’s enough to:
- buy a snack or lunch,
- walk a short stretch of the waterfront,
- and reset before the west coast.
But it’s also the most debated part of the day. Some people wish they had longer to explore Corralejo more thoroughly, while others find it busy and more touristy than they’d hoped. If you’re the type who likes browsing without feeling rushed, you may want to plan a longer Corralejo stay on a separate day.
Practical suggestion: use your hour like a checklist. Pick one thing for lunch, pick one beach zone to walk, and don’t waste the time “deciding” once you arrive.


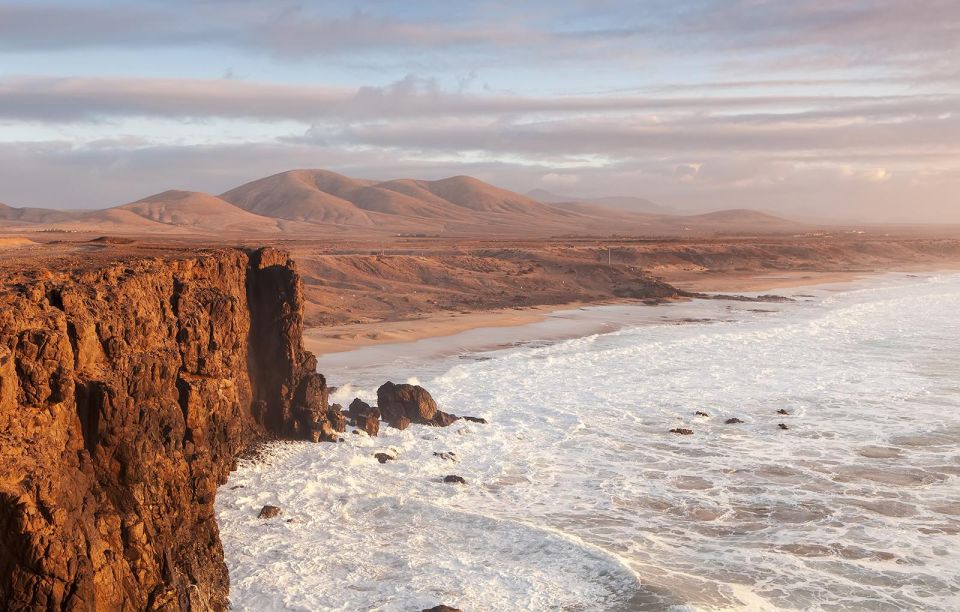
Playa El Mejillón: the scenic photo stop
Next comes Playa El Mejillón for a 20-minute photo stop / sightseeing moment. This is not the main event, but it’s a nice chance to keep your eye on the coastline and feel the coastal scale of the north.
Because it’s short, it’s best approached with a simple mindset: grab photos, stretch your legs, and re-charge your camera battery for the next stop.
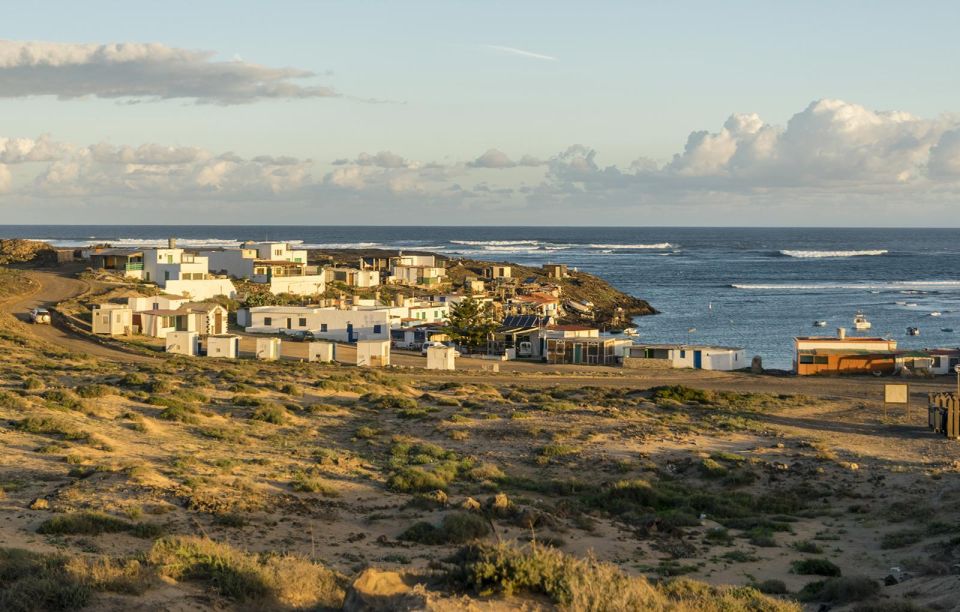
El Cotillo at the finish: fishing village character
The last substantial stop is El Cotillo, a classic west-coast fishing village. You’ll get about a 20-minute break with photo stops and time to visit.
In plain terms, El Cotillo is the antidote to the clock. Even in a short visit, you can feel why it keeps showing up on people’s Fuerteventura “next time” lists: old harbor vibes, coastline views, and that slow, sea-focused rhythm.
One small piece of context that helps: the route to the west coast includes an off-road stretch that can take you past places like Majanicho. That change of road style is part of the “wild north” feel—gravel and dusty textures instead of smooth highways.
If you don’t mind a little grit and movement in the van, you’ll probably enjoy how the day ends with something more local and less resort-like than earlier stops.
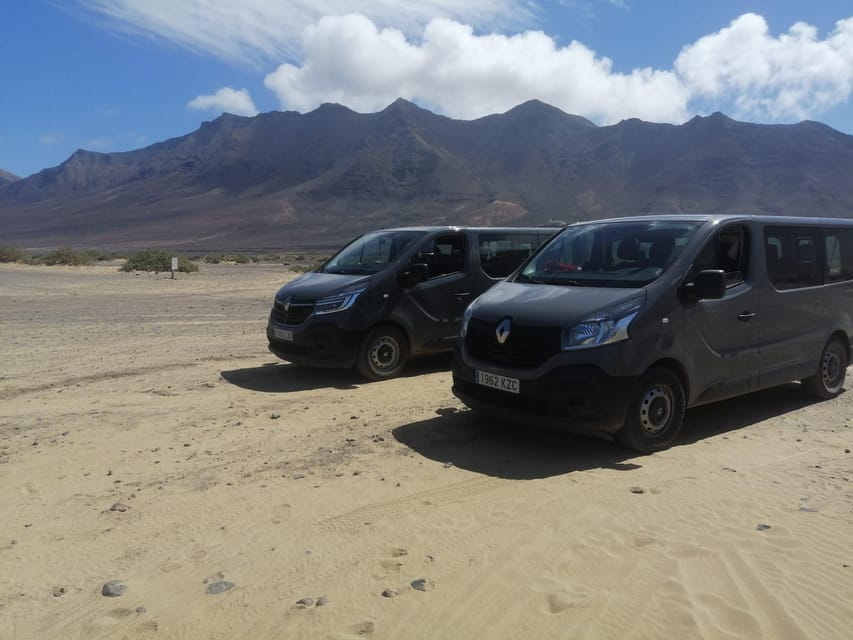
Driving time, off-road bits, and the real pacing math
This tour is about variety, so expect driving between every highlight. If you’re sensitive to long stretches, you’ll feel it. If you enjoy seeing a lot in one day, you’ll love it.
A few pacing realities from the pattern of the day:
- You start with a longer transfer (about 1.5 hours) before the first north viewpoints.
- The crater walk is short on paper, but it’s the most demanding part physically.
- Corralejo gives you a single hour—enough for lunch and a quick look, not enough for deep exploration.
- There’s at least some off-road/gravel driving on the way west, so plan for dust and vibration.
For most people, the value comes from the way the stops are sequenced: dunes → crater → Corralejo break → coastline stops → El Cotillo finish. You don’t just bounce between random points. You keep moving through the north’s key “themes.”
Price and value: why $88 can make sense here
At $88 per person for about 7 hours and a small group max of 8, I think the value is solid if you’re staying in the south and want the north highlights without rental headaches.
You’re paying for:
- hotel pickup and drop-off
- a guide
- the hike/walk component (the crater part)
- and the logistics of getting you between distant north areas
Food and drinks aren’t included, so budget for lunch on your own in Corralejo. But the overall price still often beats the “time cost” of self-driving if you’re not already familiar with north routes.
The guides—especially names you’ll see repeatedly in feedback like Isabel and Tim—also seem to add quality. People describe them as friendly, safe in driving, and good at making the day feel smooth even when the itinerary is full.
Who this tour fits best (and who should rethink it)
This is a great fit if you want:
- a first look at northern Fuerteventura from the south,
- dunes + volcano + coastal towns in one day,
- and a guide who keeps the group organized.
It may be less ideal if you:
- need wheelchair access (not suitable),
- have mobility issues with uneven terrain (crater walk is the risk spot),
- or prefer slower travel with long beach time instead of multiple stops.
Age-wise, it’s not suitable for children under 6 and babies under 1, and it’s not suitable for people over 95.
Should you book this Wild North and Corralejo tour?
If your goal is to see a lot of northern Fuerteventura efficiently—Calderon Hondo, Popcorn Beach, Corralejo, and El Cotillo—this tour is a strong option. The biggest “make or break” is the crater walk: bring grippy shoes and don’t treat it like a casual stroll.
If you’re already planning to spend a day in Corralejo anyway, you might squeeze extra value by using this tour as your northern highlights day and saving Corralejo itself for longer, slower exploring.
FAQ
What’s the duration of the tour?
The tour runs for about 7 hours. Starting times depend on availability.
How many people are in the group?
It’s a small group, limited to 8 participants.
What languages are offered?
The excursion language is English and/or German depending on bookings, and guides speak both.
Where does pickup happen?
Pickup is available from Costa Calma, Morro Jable, and Esquinzo.
Where do you drop off?
Drop-off locations are Esquinzo, Costa Calma, and Morro Jable.
What stops are included?
Key stops include Dunas de Corralejo (photo stop), Calderon Hondo (photo stop, visit, walk), Corralejo (free time), Playa El Mejillón (photo stop), and El Cotillo (break and visit), plus Popcorn Beach as a must-see stop.
Is food included?
No. Food and drinks are not included, so plan for lunch during the Corralejo free time.
Is the tour good for people with limited mobility?
It’s not suitable for wheelchair users, and the crater walk involves uneven ground, so comfort on foot matters.
What should I bring?
Bring comfortable shoes, swimwear if you want to use beaches, a camera, sunscreen, and beachwear/comfortable clothes.
Is it refundable if plans change?
There’s free cancellation up to 24 hours in advance for a full refund.